I don’t suspect that I’m a "typical" computer user with my daily working with four different computers and constant travel but most of my readers I’m sure have at least a home and office computer. I’m also pretty sure that at some point you’ve "left that important file on the other computer" and have no easy way of getting it short of calling someone to get them to e-mail it to you. Great if your office is open and the file is small, but getting a file at 7am when you’re presenting at 8, and it’s a 10MB PPT file and you’re basically screwed.
I’ve played with many different services to synchronize devices in the past my most of them are cumbersome at best, hardly functional at worst. However, yesterday I was given access to the "tech preview" of Windows Live Mesh and all I can saw is "where have you been all my life." (Supposedly this is open to everyone in the US but I’ve heard reports that so many people tried to access it yesterday that they’ve since closed it to new users again. So, your ability to register may vary.)
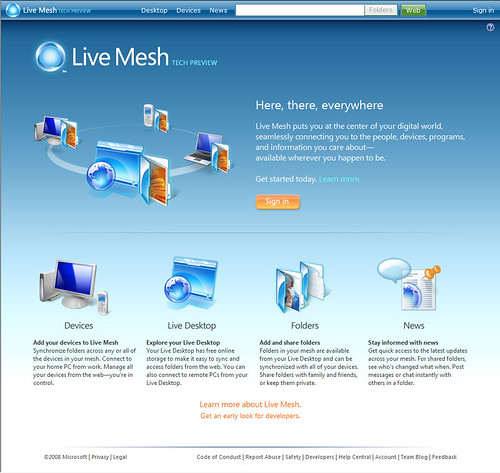
So, let me take you on a tour of Live Mesh and explain to you what it does and (basically) how it works.
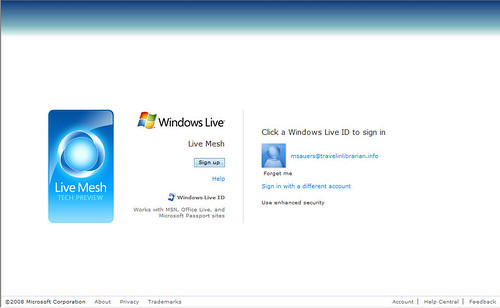
First you head over to http://www.mesh.com/ and select the Sign in button. (I recommend you do this in IE as opposed to Firefox. I’ll explain why later.)
All you need to log in is a Windows Live ID. (This is what was originally Windows Passport.) If you already have one, just use it to log in. If not, follow the instructions for getting one.
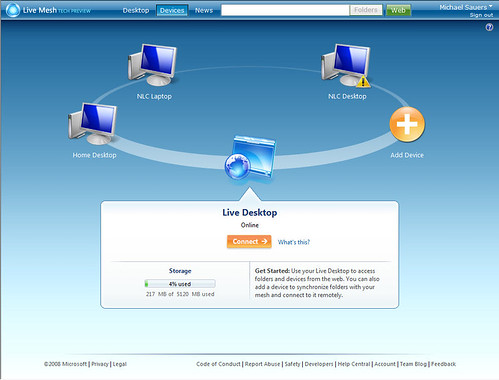
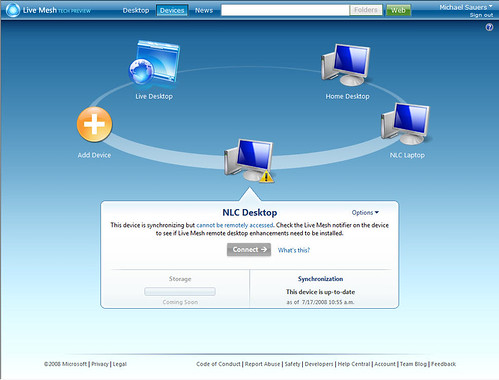
Once signed in you’ll be presented with the Devices screen. At first you’ll only see choices for "Live Desktop" and "Add Device". Here you’ll see that I’ve already added three devices and currently two of them are running and connected to Live Mesh. (NLC Desktop is not. Why, later.)
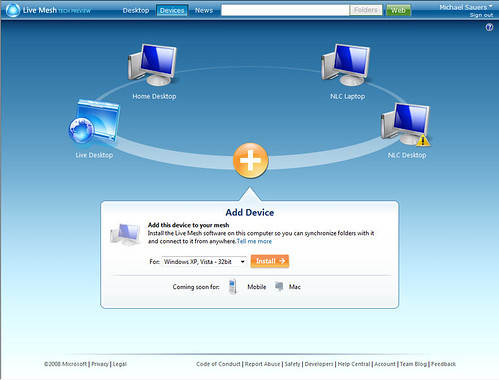
To add a device to your Mesh select the Add Device icon, choose from the list of available device types (right now just 32-bit XP/Vista and 64-bit Vista PCs) and click the Install button.
I don’t have screenshots of the install process since most of it happens behind the scenes. You’ll be asked to Run a downloaded install.exe and once run a status balloon will appear in above your system tray telling you that Live Mesh is being installed. You’ll eventually be told that Live Mesh is starting and ultimately be asked to log in with your LiveID. At this point you’ll also be asked to name your computer to be able to tell it from the others in your Mesh.
Once this process has been successfully completed your device will be listed on your Live Mesh devices screen.
In the case of my "NLC Desktop" the installation program did run but I was asked for the admin username and password for the computer. Since I didn’t have that information I clicked cancel thinking that was that. Well, it still lists my device and I still have access to the synching functions of Live Mesh. However, I do not have the remote desktop feature. Go figure..
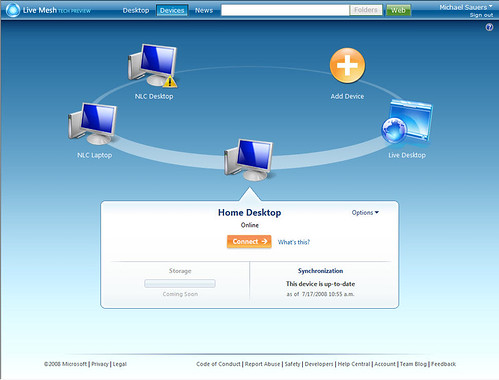
This next screenshot shows the listing for my "Home Desktop" which did install completely and correctly. For this device I have both synching and remote access.
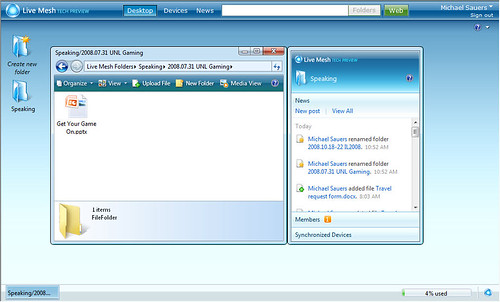
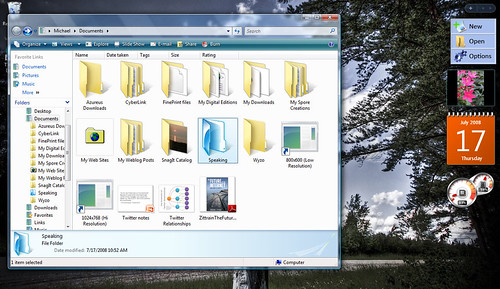
Even if you don’t add any devices, Live Mesh will give you access to a "Desktop" which I’ve shown below. Here you can store files and create folders just as you would with other online storage services such as Windows Live Sky Drive. This feature alone is worth taking a look at.
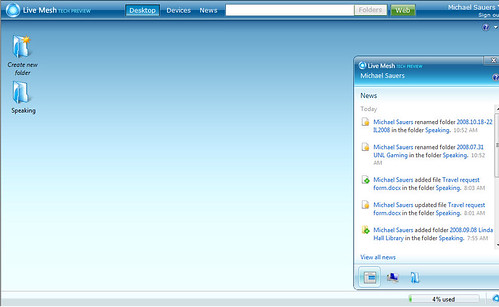
In my case I’ve created a folder for upcoming speaking engagements and can upload files into it. When I’m later at a different location and don’t have one of my computers with me I can simply log into my account, and download the file to that new local computer without installing any of the Live Mesh software.
For example, I’m at a library to give a presentation and they do not have the ability to hook my laptop up to their projector. All I need to do is get on their computer, launch the browser, log into my Live Mesh account, got to the desktop, find my PPT file, and open it. This will download the file to the local computer and open it accordingly. A great way to backup files you might need later. Total amount of online storage allowed at this time: 5GB.
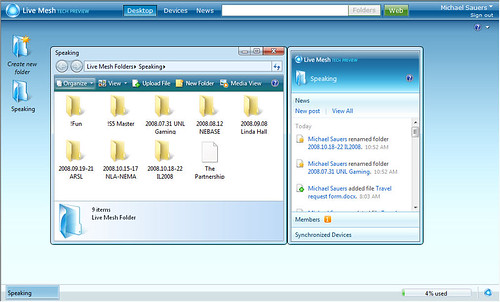
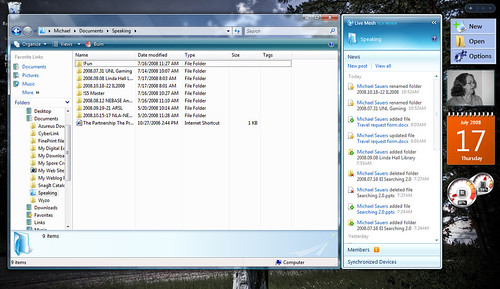
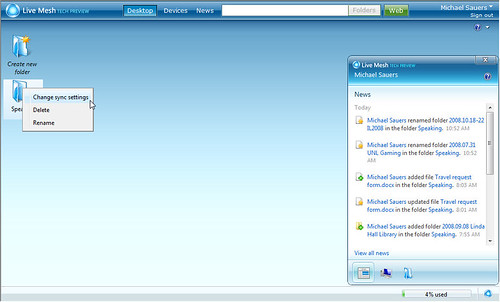
What you’ll also see attached to the folder off to the right is a secondary window displaying information about your account and the files contained within the folder you’re currently viewing. The next screenshot shows the "News" about that folder. I’ll get back to this in more detail when I talk about folder synching.
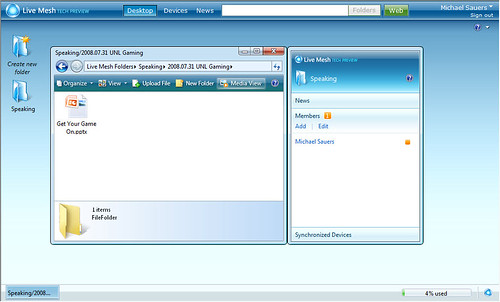
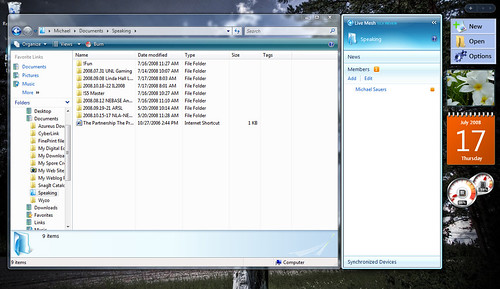
Next you can see the Members information for this folder. Live Mesh has the ability to share files and folders between account holders. As I do not yet know anyone else using Live Mesh I’ve not yet had the opportunity to play with this feature.
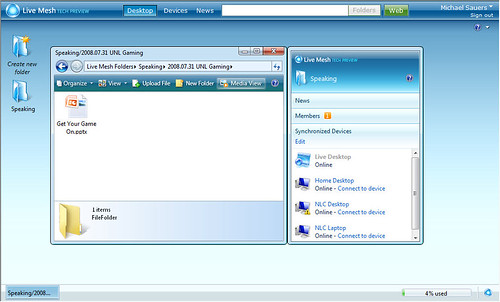
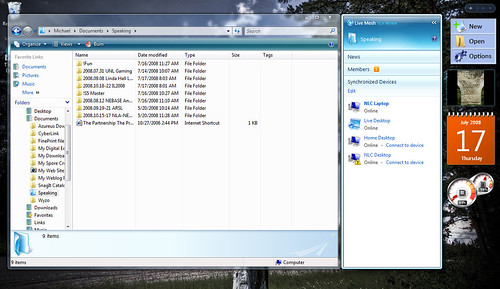
The third bit of information is about which Devices this folder is synched with. Again, more about this shortly.
To create a new folder select "Create new folder" on the desktop and give the new folder a name.

Additionally, when you create a new folder you can set the synchronization options for that folder, essentially choosing which of your devices you wish to have copies of the content of that folder.
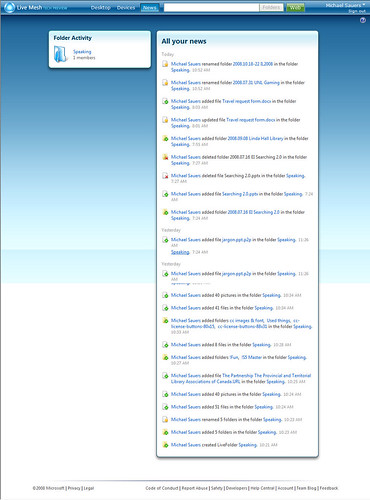
The "News" link at the top of the window will show you the recent activity (mostly relating to synching of data) for your account. I’m assuming that this information is more useful when you have multiple people sharing folders and documents so you can see who’s done what with which files.
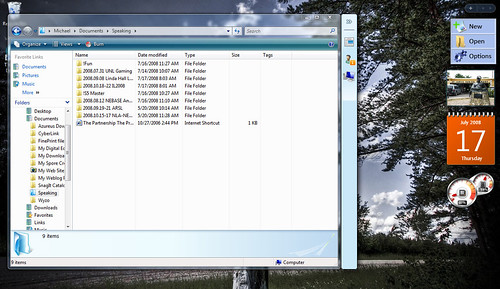
Once you have created a folder on your Live Mesh desktop you can then choose to sync the content of that folder with a folder on one or more of your devices. I’ve done that with my Speaking folder. Below shows what that folder now looks like on my NLC laptop. The shiny blue folder indicates that this folder is being synched via Live Mesh. (The folders do not need to have the same name but I’ve done so just to keep things clear.)
Once I open that folder I’ll get the additional information window attached to its right side. This info window contains the same content as the one on the Live Mesh desktop: News, Members, and Synchronized Devices. (Shown in the next three screenshots.)
This information window can also be collapsed by clicking on the "<<", reducing it to a smaller bar of icons. Click the ">>" or any of the icons to open the information window.
That’s what it looks like, but what exactly does it do? Well, synched files will mirror exactly what’s been done in all the versions of that folder across your Live Mesh desktop and any synched devices. Here’s what I’ve done:
I’ve got a "Speaking" folder on all four of my computers. This folder should contain copies of all the files relevant to my upcoming speaking engagements. The trouble has always been keeping track of which computer held the most recent version. This is no longer a problem. Once I set up the sync across all my computers, Live Mesh took over and made sure that the content of my Speaking folder on all the computers had the exact same content.
Now, whenever I change a file by renaming it, moving it, copying it, deleting it, or editing it’s content, at the soonest available time, Live Mesh will cause those changes to be reflected on all the other computers. For example, if I’m at home and decide to work on a PowerPoint presentation, I just open it on my home laptop, make the changes, and click save. When I get into the office the next morning and turn on that computer, Live Mesh will notice the changes and replace the now old version on the office computer with the new version from my home computer.
At all times, the versions sitting on my Live Mesh desktop will always be the current version.
If I upload a new file to the Live Mesh desktop version of the folder, copies will be sent down to all my devices automatically.
In other words, I no longer have to worry about making sure that the correct version of the files I need are on any of my computers. No matter where I work on them, they’ll all have the correct version. What could be better?
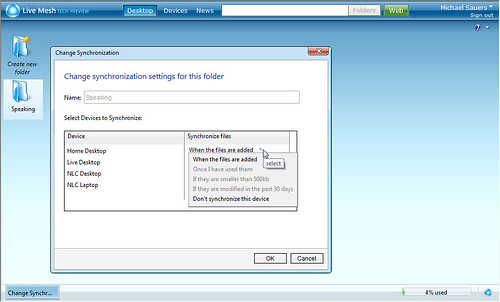
There are different options for controlling how files are Synched. These options can be found by right-clicking on the folder on the Live Mesh desktop and selecting Change sync settings.
You’ll then see the Change synchronization setting for this folder window.
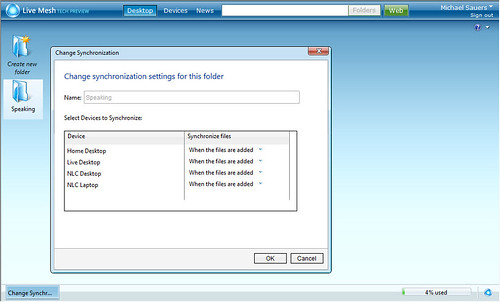
You can now choose to change the method of synching, including turning synching off, on a device by device basis.
The other major feature of Live Mesh is the ability to create a remote desktop session. To do this go back to your Devices list, select the appropriate (connected) device, and click the Connect button.
Here’s the IE vs. Firefox bit. The remote desktop feature will not work in Firefox as it relies on ActiveX controls. Everything else, will work in Firefox just fine. (I’ve just used the "Open in IE" Firefox extension to automatically launch IE whenever I go to the Live Mesh site so I don’t every have to be frustrated when I try to open a remote session.)
The first time you connect to a new device some ActiveX controls will need to be installed. This is only a problem for some as you need admin privileges for these to install successfully. (This is why in earlier screenshots you see that "NLC Desktop" is not connected. I don’t have admin-level access to that computer.)
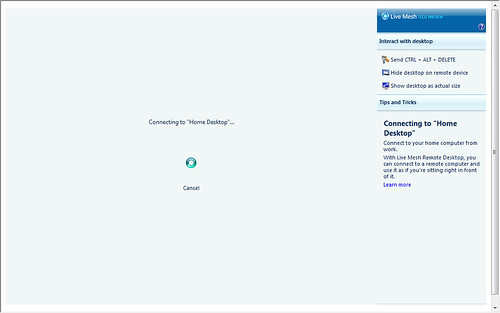
Once the ActiveX controls are installed you’ll see a screen telling you that it is attempting to connect. In my experience this can take up to 30 seconds to work.
Once connected it works just like the traditional, but hard to set up, Windows Remote Desktop.
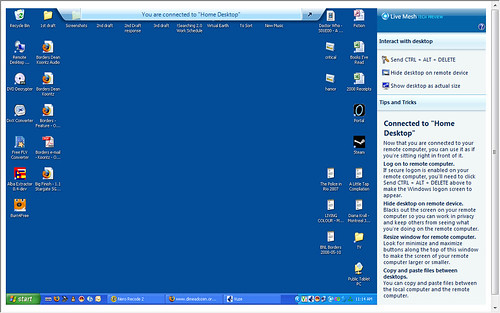
Tips are displayed off to the right including links to send a CTRL-ALT-DEL to the remote computer, blank the screen on the remote computer so no one can watch what you’re doing at the remote location, and to show the remote desktop at 100% instead of the default "fit to window" as I’ve show above.
Additionally, there’s an arrow in the bar across the top which when clicked switches you into a full-screen mode, essentially turning your computer into the remote computer.
But, you may ask, why is this any better than the traditional Windows Remote Desktop? That’s easy, with Live Mesh you can copy and paste across computers! This is something you couldn’t previously do. You still can’t drag and drop between the local and remote computers but you can easily find the needed file on the remote computer, copy it, switch to the local computer and paste. It’s a little slow (a 250MB video file insisted that it was going to take four hours to copy so I didn’t bother) but if you forgot a 5MB PPT file, this is a great solution.
AS you may expect, not all is roses. Live Mesh is definitely impressive and solves a lot of the issues that I’ve been having keeping four different computers in sync, and for retrieving remote files while I’m on the road. However, there’s definite room for improvement.
- The support for mobile devices, and maybe more importantly, Mac clients will be essential for large scale implementation.
- I have yet to get Live Mesh started on my home Vista laptop. It seems to have installed just fine but keeps telling me "Failed to start Live Mesh". I’ve searched all the forums and I do know that I’m not the only person with this problem. Considering that it did install and run earlier in the day I suspect that this may be due to the alleged closing of the tech preview.
- Remote desktop is a bit slow. In the past I’ve been using a combination of Hamachi & RealVNC for my remote desktop sessions and that is faster. This is due to RealVNC reducing the umber of the colors displayed in the remote session thus allowing the screen to redraw faster. Live Mesh keeps full colors and only removes the wallpaper. I’d like to see an option to change the number of displayed colors based on connection speed.
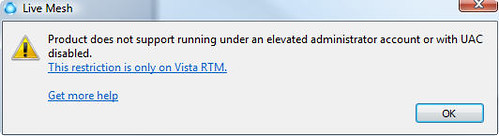
- This last one is a bit odd. It turns out that Live Mesh requires User Account Control (UAC) to be enabled in Vista before it will install. On my home laptop I’d completely disabled UAC. (This isn’t something I actually recommend.) However, when I first tried to install Live Mesh on that laptop I got the following error message. (It looks like Microsoft isn’t kidding about this UAC thing.)
So there you have it, my initial impressions of Windows Live Mesh. I’m sure there’s features I’ve missed and I’m looking forward to using it to share documents with others. (Is you’re willing to play, get an account and let me know. I’ve got five sharing invites to give out.) The bottom line: this is a great product and could only get better.
Excellent and well thought-out review. Thanks for taking the time, it looks like Mesh is worth a try.
This was a very helpful review. I am trying out the Live Mesh. Looks like it will be the best way for me to share my HUGE folder of photos with my family while I’m constantly traveling. I’ve been looking for a way to get a huge amount of storage space free that they can access. This might just be the solution. Thanks!
I have solved “Failed to start Live Mesh” problem by installing live messenger to the computer. I think, live mesh does not have all the required passport libraries.
IT also found somewhere that Live Mesh doesn’t like accounts with user names that contain apostrophes. (My user name was “Travelin’ Librarian”.) I’m now running it under a different account name (TV) and the problem has disappeared.
Thanks for this extensive review! We’re now some months later; I think I’ll give it a go ;-).